The Sharper Your Knife The Less You Cry


Probably the single most important kitchen tool is a sharp chef's knife.  Most experts say that a good cook can survive with just a chef's knife and paring knife. I think that unless you have pretty small hands, just the chef's knife will do for 95% of prep cooking.

A sharp knife makes preparing vegetables, meats, herbs, fish - anything you cut - faster, easier and safer.

Notice carefully the adjective 'sharp' before knife. Even the most well constructed and expensive knives are worthless if they are not sharp. Professional chefs are almost maniacal about knife sharpness.

Before we go over the benefits of a sharp knife, let's make sure you know how and what to do to keep a knife sharp - there are two aspects to it.


  1. Regular use of a steel or ceramic knife sharpener. This step is a 10 second task that should be undertaken  either every time you cook, or at least once a week if you don't cook that often.  Simply run each edge of your knife across the rod, holding it at about a 15 to 20 degree angle. This process is usually called 'honing' and serves to straighten out minor imperfections in the blade edge as the knife is used. These tools can be obtained for around $15-20. 
  2. Annual professional sharpening. This is known as "restoring or recreating the edge". Eventually, even regular honing will not keep a knife sharp. For usually $10 or less, a professional knife sharper will restore your edge to razor sharp perfection. Check with a local hardware store or at  farmer's markets, which often  have a knife person around. 

You do not need an expensive electric sharpener. Many of these tools are ineffective, hard to use and sit idle even when you ought to be using them. The every day/every week task is easy, and that annual-ish resharpening breathes new life in your favorite knife.

You also don't need an expensive knife. The current wave of Santuko knives, designer ceramic bladed knives and so on.....all fine. But mostly this is the result of marketing, not some new breakthrough in cutting. A moderate quality knife, kept sharp, is far more important than a few hollow ridges or flashy ceramic colored knife.  

How Sharp is Sharp? 

Your knife should be SO sharp that a tiny slash with the tip of the blade can slice a fresh tomato, or rip through tough plastic packaging. Except for some of the toughest root vegetables - like turnips or rutabagas - a chef's knife will almost glide through. This makes cutting faster, easier, less tiring and even safer.

Yes safer.

A woman named Kathleen Finn wrote an account of her training at a Paris cooking school, titled The Sharper Your Knife the Less You Cry. Nice book. But the title holds an accurate phrase, in a way.
  • You're less likely to cut yourself with a sharp knife, because it's less likely to slip off the skin of a vegetable or other item you're working on.
  • Since the sharp knife cuts more easily, you'll require less force to cut things, which decreases the chance of an accidental cut.
  • If you do happen to cut yourself, a cut from a sharp knife will hurt less and heal faster than a cut from a dull knife. Why is that? Because the rough edge of a dull knife creates a more ragged cut. Consider a scalpel, compared to a sharp steak knife compared to a dull everyday kitchen knife.
When I started cooking seriously after college, a very good knife was one of my first investments.  I bought a Portuguese knife from Alfred Zanger company, which unfortunately no longer import knives. However, I still use it regularly (and got it resharpened last month).

When the Zanger knife took an unplanned vacation in Wisconsin for a year (really, I travel with my knife and once forget it at my friend John's place), I purchased a very inexpensive and popular Swiss chef's knife from Victorinox.  Frankly, it is equally as good as the Zanger, which is equivalent to a $100+ German knife.


If you want to read more about my recommendations for important cooking tools, read this article: Kitchen Tools You Can't Live Without.

Use Your Sharp Knife for Chicken and Root Vegetable Soup

This is a great recipe to work on your knife skills. If you've got the time and patience, try to cut all those 1/4" vegetables into very uniform cubes. The best way to do that - cut 1/4" slices, cut those into 1/4" sticks, cut those into 1/4" cubes. 

Chicken and Root Vegetable Soup
Serves 8

1.5 pounds chicken breast
3 cups potatoes
2 cups each turnips, celery root, leeks
1.5 cups each carrot, onion
1 cup parsnips
3 garlic cloves
3 tablespoons butter
6 sprigs fresh thyme (or 3/4 teaspoon dried)
1 fresh bay leaf (or 2 dried)
8 cups fresh chicken stock
3 tablespoons Sherry (optional)
  1. Cut chicken into 1" cubes. Peel and cut all root vegetables to 1/4" cubes. Finely dice the leek.
  2. Heat butter over medium heat. Add onion and garlic, cook until wilted. 
  3. Add the chicken and combine with onions. 
  4. Add all the remaining vegetables. Combine and cook 2 minutes to barely heat through. 
  5. Add the stock, thyme, bay, Kosher salt and fresh ground pepper. Bring to a boil and simmer for 20 minutes. 
  6. Taste for seasoning, and add more salt and pepper if needed. Add the Sherry and cook for 3 more minutes. 
Note: This recipe is simple, but it takes a long time to cut up the vegetables. Plan on one hour total time. 

Two Corrections

Sorry about this.....but I don't want anyone to make bad soup.

If you are a KINDLE reader, please note that the Root Vegetable Soup recipe reversed two ingredients. It  should read:

2 cups turnips
1 cup parsnips

If you are an EMAIL subscriber. An update went out on Monday January 24 with a repeat title and some funky formatting. This was unintended.

Pasta With Carmelized Onions

The original version of this recipe appeared in Cooking Light magazine. As I mentioned in my last post, few of CL's recipes are really very well composed. It seems like there's a significant problem in recipe composition or instructions in most of their recipes.

Take this recipe, for example. Besides the ingredients you'll see in my version of the recipe, they called for 3 1/2 cups of sliced radicchio. Radicchio is that vegetable that looks like purple cabbage, but is smaller and has a different taste. The bright, almost spicy taste of radicchio is what adds a little jolt of flavor to a sophisticated salad, much like arugula can do.

But 3 1/2 cups of raw radicchio for one pound of pasta is insane. Even if you're a radicchio lover, which not everyone is, that's an enormous mound of raw vegetable, even if it wilts a bit when added to hot pasta. Further, the picture published with the recipe doesn't begin to show that amount - just a few tasteful strands.

So what's going on with this Cooking Light disaster? Is there a typo - did they mean 2/3 cup instead of 3 and 1/2? Did they intend that 3 cups gets cooked down with the caramelized onions, than 1/2 cup raw is added to finish? We'll never know. But this is a great example of a recipe that looks good initially, but contains fatal (OK not fatal, just glaring) errors.

Pasta with Caramelized Onio(and maybe some radicchio if you'd like)
1 tablespoon olive oil
1 tablespoon butter
6 cups onions, thinly sliced
-- You'll need 1.5 to 2 pounds, which sounds like a lot, and at first looks like a lot, but trust me on this one
Crushed red pepper flakes
6 garlic cloves, smashed and sliced
1/2 cup white wine
1 red pepper cut into thin strips, or 1 cup sliced radicchio (optional)
1 pound pasta
1 tablespoon fresh oregano 
-- or 1/2 teaspoon dried
2 ounces Parmigiano Reggiano, grated
  1. Heat oil and butter in a large skillet or dutch oven over medium-high heat. Cook onion for 15 minutes, then lower heat to medium-low and cook another 20 minutes or more until onions are a deep golden brown. Season lightly with salt twice during while cooking the onion.
  2. Add garlic and red pepper flakes to taste (no more than 1 teaspoon). Add pepper strips or radicchio is using. Cook 3 minutes.
  3. Add wine and cook until liquid is absorbed.
  4. While onions are browning, cook pasta and drain, reserving about 1/2 cup of cooking liquid.
  5. Toss pasta, onion mixture, oregano with a generous amount of kosher salt and fresh ground pepper. Mix in reserved cooking liquid to create a little bit of sauce consistency. Serve with grated Parmigiano.

68 Fresh and Healthy Recipes ** A Favorite Article from 2010

This is another favorite column that originally appeared in Be A Better Cook last year. 
I'm providing some repeats for the new group of subscribers who began reading this blog recently. 


"68 Fresh and Healthy Recipes" 
Fast Pasta and Sausage
Tacos and Gumbo
Super Salads
Nutrition Myths
Easy Gorgeous Feast For Spring
Our Yummiest Coconut Cake Ever

These headlines are from the cover of this month's issue of Cooking Light - a true smorgasbord of teasers and come-ons. Tacos and Gumbo? At the same meal? I hope not. 

I've had a number of people tell me how frustrated they get when they page through a cooking magazine. It may be that everything looks so good they have a hard time deciding which dish to cook. Or, as they scan so many recipes they're just not sure which ones would turn out well for them. Or which are too hard or too slow to make. Whatever the case, friends have told me they get information overload. 68 recipes (more than 2 per day) sounds like overload to me.

Cooking Light is the most successful cooking magazine on the market today, as it draws in more advertising pages than any other title - by far. Cooking Light isn't the kind of resource I've relied on for recipes or ideas in the past. But since it is read by so many people, I subscribed for a while and  made a few dozen of their recipes over the past 6 months.

Here's what I've learned:
  • Published recipes have confusing instructions **, have mistakes, or typos.
  • "Certified" or "Test Kitchen Guaranteed" recipes can still be "just OK".....or worse.
  • Stated cooking times are usually off by a lot (and I'm really fast and organized in the kitchen).
  • It's really hard to tell which recipes are going to be good and which not so good.
Overall, I'm not too impressed with Cooking Light. The recipes variously call for expensive convenience ingredients such as pre-chopped garlic or grape tomatoes. Yet the same recipe may then specify a complicated or unnecessary steps to perform, thus losing time you "purchased". 

I also think Cooking Light recipes generally call for too many ingredients. Why is that? I think they're "throwing the kitchen sink" at the recipe to drive out flavors. Or they know that most people will skip a few ingredients they don't have on hand - so they're hedging their "bet" on the recipe. Yet, I've found most of their end results to be pretty bland. Frankly, the recipes just aren't that good.

So what does this mean to you?
  • Put mainstream media in perspective. They are trying to attract as many people as possible and I believe they sacrifice food and recipe quality to achieve that goal. Don't forget, they're really in the business of selling ads.
  • Rely on a few high quality recipe sources. Focus on  highly recommended cookbooks such as How to Cook Everything, Jamie at Home, or Molto Itali One of the best magazines out there is Cooks Illustrated. There is no advertising, it's an attractive presentation, and they do very thorough analysis and testing to create really flavorful dishes. Yet nothing is all too fancy. They're really focused on good tastes.
  • Don't forget that the shortfalls in Cooking Light apply to random Internet searches for recipes too. Just because something sounds good, doesn't mean it's a good recipe / version of that dish.
Of course, I'm not saying all the recipes are bad. However, I don't think I made a single one that didn't require some sort of modification. I'm not suggesting modifications "....to suit my taste....", but rather modifications to keep it from being a fairly disastrous or inefficient or overly costly recipe.


So this week I share a recipe from November's Cooking Light with you, with one simple modification: Pasta with Carmelized Onions. See it in the next post.


** Here's a poor instruction:
    "Add onion. Saute 15 minutes or until almost tender. Reduce heat to medium low; cook until deep golden (about 20 minutes)."
    Does that mean 15 minutes, plus another 20? Or does it mean 15 minutes, plus five more to total 20 minutes. Maybe because the 20 minute instruction is in parenthesis, it's throwing me. If it weren't, I'd clearly treat it as an additional 20 minutes, because it would be presented in a similar manner to the first timing instruction. I'm not trying to be too picky - but for a cook without a lot of confidence and experience in the kitchen, would he/she really know what to do? Do you?
    BTW - the correct approach is 15+20. Carmelizing onions for a little over 30 minutes is the best way to get delicious, sweet flavor from them. They're awesome.
           

Red Beans and Rice - Easy to Make, Hard to Sell


Here's a second recipe entry for this week and another example of a really good reliable recipe.

The other day I was extolling the virtues of using a good recipe, even for a simple dish like chili, rather than improvisation. Recipes and improvisation  both have their place, but using a really good, reliable recipe provides a very strong starting point for good home cooking. Notice carefully the phrase "good, reliable".

Unless you were raised in Louisiana and have made red beans and rice since you were a child, you'd certainly  need to seek out a recipe if you decided to cook them. Easily, you'll find many versions. This particular recipe is just about a perfect representation of the classic dish.

It fact, if you were to not follow this recipe almost exactly, it would certainly make it worse. And, it's one of the exceedingly rare examples where I use dried herbs and have not yet modified the recipe to use fresh herbs to maximum effect. The reason for that is that when red beans and rice are made in Louisiana, it would be exceedingly rare to not use dried herbs. My biggest modification is to use at least 50% fresh shrimp or chicken stock instead of water.

The only downside or red beans and rice is serving them to someone who has never heard of, or seen, the dish. It's not really, well, visually appealing. Even for my teenage spicy food eater it took two attempts to get her to try it.

Printer Friendly Version - Click Here

Classic Red Beans and Rice
Serves at least 8 hearty eaters

1 pound kidney beans, covered with water, soaked overnight
1 pound andouille or other smoked sausage, such as kielbasa
  -- The Texas-style sausages from Chappell Hill, Holmes, Meyer and other hill country purveyors are excellent for this dish.
1 large onion, chopped
4 stalks celery, including leaves if you have them, chopped
4 cloves garlic, chopped
6 cups liquid, at least 2 cups being fresh shrimp or chicken stock the rest filtered water
1 tablespoon dried thyme
2 teaspoons dried oregano
2 bay leaves
1 teaspoon tabasco sauce
3/4 teaspoon garlic powder (I had to buy some just for this recipe - never, ever substitute this for real garlic)
1/2 teaspoon ground allspice
1/2 teaspoon ground cloves (another pretty rare ingredient)
1/2 teaspoon freshly ground pepper
2 teaspoons kosher salt
2 cups cooked rice

  1. Slice sausage lengthwise, then cut into 1/4" thick slices (so each piece is a half-moon)
  2. Combine all ingredients except half of the sausage. Bring to a boil, then simmer covered for 1.5 hours. 
  3. Uncover and simmer for another hour. 
  4. Remove 1 cup of beans, returning any sausage pieces to the pot. Mash the beans until they make a paste. I use an unusual but handy tool called a dough cutter, which has five or six semi-sharp edges. It's a secret weapon in my kitchen used for biscuit dough, guacamole, mashed potatoes and mashing red beans. You can also use the back of a spoon to mash, but it takes longer. 
  5. Return the mashed beans to the pot, add the sausage and simmer for 5 minutes.Serve over rice. 

Everybody Makes Chili


Sure they do. College students, tailgaters, just about anyone with a few pounds of beef, some peppers and a fire can do it. I'm writing this column sitting in a roadside BBQ joint in Coldspring Texas, where the owner/cook just told me about his chili recipe.

I remember the first chili pots made on New Year's Day for friends and football frenzy. Atop ground beef were tossed cans of beans and tomatoes, further supplemented by, I think, a few cans of Rotel chilis. That was definitely in the early days of my cooking career.

I still make chili once a year, especially when the temperature dips and football is in full swing. So if anyone can make chili - why should I bother adding it to a discussion of "being a better cook"?

Because one of the most important parts of good cooking is recipe selection.

Wait a minute. Shouldn't chili be 90% inspiration? Sure - why not? But on the other hand, following a well composed recipe, even for simple chili, can lead to excellent, repeatable results. You might not even like the recipe I'll offer in the next post, but as a starting point, it has some important characteristics which make this an above average recipe, or maybe better:

  • Use of multiple kinds of peppers, in different forms (New Mexico and Ancho dried; Red Bell Pepper, Poblano and Jalapeno fresh; cayenne and / or hot pepper flakes and some fresh ground black pepper). 
  • The use of ground pork and ground beef. The pork softens the texture a little.  
  • A well-composed ratio of vegetables to meat. 
  • The use of homemade stock (see last week's article about chicken stock). 
  • The use of black beans for contrast in texture and color. 
  • Fresh herbs (see this week's article). 
  • A short cooking time - which keeps the vegetables from breaking down, and the meats from getting tough.
I'm not recommending my recipe just because I think it's good. 90% of this recipe originated from Pierre Franey. Pierre was the author of the 60 Minute Gourmet column which ran for many years in the New York Times. He was responsible for encouraging thousands of home cooks, providing straightforward advice and recipes that revealed multiple layers of subtle flavors. This was due to his classical training in French cooking, his restaurant experience and his desire to share with everyday home cooks. 

One last thought - how does one find a reliable recipe? Well, that's the subject of an entire other column. For now, trust me on this one. 

Tom's Chili A la Franey


This recipe is my adaptation of a recipe that Pierre Franey published in 1989 in his classic cookbook Cuisine Rapide. It's been updated to include products that are now easily available at virtually all grocery stores - like ground ancho chili pepper and fresh poblano peppers. I also use fresh oregano and a number of other subtle improvements.

I know that the list of ingredients below is long, but the recipe isn't complicated in any way. I usually chop the vegetables while the meats cook and drain. Other than the chopping it's a very easy recipe.

Tom's Chili A La Franey
Serves 6-8


1 pound ground beef, 80% lean
1 pound ground pork
3 large ribs of celery, chopped
1 large onion, chopped
5 large garlic cloves, coarsely chopped
1 red bell pepper, seeded and chopped
1 green bell pepper, seeded and chopped
1 large or 2 small poblano peppers, seeded and chopped
1 jalapeno, seeded and finely chopped
5 teaspoons Ancho chili powder
5 teaspoons New Mexico chili powder
1 teaspoon cayenne pepper
3 large sprigs fresh oregano
   -- or -- 1 tablespoon dried
2 bay leaves
Kosher salt and fresh ground pepper
1 28 oz. can Italian plum tomatoes, with sauce
3 tablespoons tomato paste
1.5 cups homemade chicken or beef stock
1 pound of dried black beans, soaked overnight, simmered 45 minutes
   -- or 1 pound canned black beans, drained and rinsed

Serve with:
- Sour cream
- Shredded cheese
- Small pasta shapes
- Lime wedges
  1. In a large Dutch Oven or stock pot, drizzle a small amount of olive oil and add ground meats. Season lightly with Kosher salt. Cook for 8-10 minutes, until meat loses pink color. 
  2. Take pot off heat, place on a heat resistant surface, then place the handle of a wooden spoon under on side of the pot. Push all the meat to the higher side of the pot and let any greases collect in the low spot for about 3-4 minutes. Use a large spoon or ladle to remove all but 2 tablespoons of oil. 
  3. Return pot to medium high heat and add all vegetables, fresh peppers, dried chilies, oregano and bay leaves. Add 2 teaspoons salt and a generous grinding of fresh ground pepper. Cook for 6-8 minutes, until vegetables soften a little. 
  4. Add tomatoes, tomato paste and stock, and bring to a boil. Add beans and simmer for 10 minutes, then serve. 


The Only Shortcut To Becoming a Good Home Cook

This is another column that originally appeared in early 2010. I'm providing some repeats for the new group of subscribers who began reading this blog recently. 

I've mentioned quite a few times in my newsletters that there are no shortcuts to high quality and interesting cooking. Yet, it doesn't have to be complicated and time consuming. You need to:
  1. Use Good, Reliable Recipes
  2. Find Fresh, High Quality Ingredients
  3. Use The Right Tool for the Job
  4. Be Organized
  5. Develop Solid Fundamental Techniques
But I lied. There is one shortcut to good cooking. It's fast. It's easy. It's inexpensive. Anyone can use this shortcut, even a child. The shortcut is:

       Use Fresh Herbs

You may say to yourself, "Of course that's true. I use fresh herbs whenever I cook nice or fancy." Or this might be news to you. Either way, you could also argue that fresh herbs are expensive and don't last long. Usually you only need a few sprigs and the rest goes to waste. So it's really just a way of buying your way to being a better cook.

In some sense this is right. A bag like this one costs $2.79 at my local store.


Yet, a plant like this costs $2.49 at a garden center and will last months, even if you just leave it in the original pot and water it once in a while. If you plant it in a garden, it may last for years. My main thyme plant is ten years old now.  


And finally, an herb garden like this can support your kitchen for a decade, with only occassional replanting of perennials, and inexpensive plantings of annuals.

Here's what you need to know about fresh herbs:
  • Simply using fresh herbs where they are called for in a recipe will dramatically increase the flavor of a dish.
  • Using fresh herbs where dried are specified is typically done by increasing from teaspoon quantities to tablespoon quantities.
  • Buy potted herbs at a garden center - even if you only use them for cooking and never plant them. The small container plant will stay alive in your kitchen or on your back porch for months. And it will KEEP GROWING, funny how they do that. This way you won't continually replace expensive store bought herbs.
  • Plant an herb garden. In the south, rosemary, oregano, thyme, sage, marjoram all survive the winter. Chives, parsley, mint and cilantro do well in pots all year. Some annuals (cilantro) need to avoid the extreme southern heat, but are ideal in a garden in the north. Basil does well everywhere in the warm seasons. A bay tree (which might start as a twig) in an attractive pot can be taken in during a northern winter. I haven't bought bay leaves for 10 years now. Herb gardens need little attention, as most herbs thrive in bad soil, so it's a very simple gardening proposition.
I promised you a shortcut, and now it sounds like you have to plant a garden. Not really. You can simply grab a package of fresh herbs from the store, or pick up a simple plant and use it tonight in the kitchen. 

One of the best ways to use fresh herbs is on pasta. A mix of two or three finely chopped herbs, along with some olive oil, good parmesan and salt and fresh ground pepper make a surprisingly sophisticated dish, with lots of flavor. Last night I used thyme, tarragon and mint. It was delicious.  


Make Your Own Chicken Stock - It Pays Huge Dividends


I confess. I've used boxes of Swanson's Chicken Broth more often than I'd care to admit. Being friends with a relative from the Swanson family dynasty isn't my excuse either. Sometimes I run out of my homemade stock and am too lazy to make a batch. And there's that white and blue box sitting in the pantry - convenience at my fingertips.

Swanson's makes "stock" too, it's a little richer in flavor, but my local stores don't carry it. I've tested other brands often over the years. But in the end, you ought to make your own. There's no comparison. Why? All you need to do is make a soup recipe, one time using store-bought, another using your own stock. You might never buy a box or can again. Of course, the same quality boost occurs in any dish that calls for even a little stock. In the end, using your own stock will make you a better cook - guaranteed.

I've decided to treat chicken prepared stock like I treat ice cream - "If you don't buy it, you can't eat it". 


I learned a LONG time ago that making stock is a) easy b) rewarding and c) allows you to reach considerably higher levels of quality in your cooking. After reading an excellent essay on stock making in Michael Ruhlman's book "The Elements of Cooking" my stock making routine is even easier with better results.

Ruhlman derived his stock cooking logic from his experience at the Culinary Institute of America and his partnerships with uber-celebrity chefs like Thomas Keller and Anthony Bourdain, That, and he's a world-class home cook. Great life - writer, home cook. Hey - that's my life too. But I digress.

Using some of Ruhlman's advice, combined with my own particulars, this is the method I suggest. Detailed explanation follows in the next post.

Stock Summary
1. Whole chicken rinsed, in cool water.
2. Heat to 180 degrees, cook for about 3 hours.
3. Skim off anything that comes to the surface.
4. Add vegetables, possibly herbs, cook for 1 hour.
5. Let cool, then strain and store in small containers in freezer.

1. Foil pressed to top of frozen stock, no air, no flavor exchange.
2. Shrimp stock stored in "fish" cup
3. Hard to see mark on cup indicating "1.5 Cup" level, some are 2 Cups
4. Drip from frozen coffee ice cream cake that melted a little 


Homemade Chicken Stock


Chicken Stock Summary


1. Whole chicken rinsed, submerged in cool water in stock pot.
2. Heat to 180 degrees, cook for about 3 hours.
3. Skim off anything that comes to the surface, especially at first.
4. Remove chicken, add vegetables, possibly herbs, cook for 1 hour.
5. Strain, cool and store in small containers in freezer.

1. Foil pressed to top of frozen stock, no air, no flavor exchange.
2. Shrimp stock stored in "fish" cup
3. Hard to see mark on cup indicating "1.5 Cup" level, some are 2 Cups
4. Drip from frozen coffee ice cream cake that melted a little 


Chicken Stock Details
  • Get a whole chicken, remove the neck and giblets which are placed inside the cavity. Give the chicken a rinse to knock off any of the little "junk" that might have come along for the ride, including rinsing the inside. 
          This step takes a total of 2-3 minutes, max. 
  • Put the whole chicken into a large pot and fill with COOL water, to cover the chicken
          I use an 8 quart stock pot for one chicken. 
          The 12 quart pot shown below is a great bargain at amazon for only $69. 
          I'm sure I paid twice that much for my small pot years and year ago. 
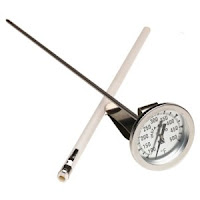
  • Put the heat on medium high, but DON'T let the water boil. It should come to 180 degrees, at which you'll see just a slight shimmer on the surface of the liquid from the heat.
          You can do this by just watching it or use a kitchen thermometer. 
          I stick in a long-stemmed thermometer that clips to the pan. 
  • Use a spoon, slotted spoon, small strainer to SKIM anything that rises to the surface. It's more important to do this a few times early in the process than later, to keep the scummy stuff from influencing the flavor of the stock.
          Experiment with your utensils until you find one that removes the scummy stuff most easily.  

  • Cook the stock at this temperature for 2 to 4 hours. 
          During this time, you do nothing more than skim the stuff from the surface a few times.
          On the other hand, the more you skim, the cleaner, clearer taste you'll get from the stock. 
          As Ruhlman says, "generally speaking, you can't skim too much". 
  • Remove the chicken using kitchen tongs and place pieces in a bowl to cool. The chicken will likely fall apart as you remove it. 
          OK, chicken cooked for hours in hot water will be a little, well, overcooked. 
          But, if the water never boiled (remember 180 degrees) it will be better than you'd expect. 
          I pull the meat off the bones and make a batch of chicken salad.
          My recipe: shallot, celery, tarragon, mayo and sour cream. 
  • To the stock pot, add 3 ribs of celery, 3 carrots, 1 large onion, about a dozen whole black peppercorns. 
          If you'd like more flavor, add a bay leaf, some parsley stems or a few fresh thyme sprigs. 
  • Cook the vegetables for ONE HOUR or less. 
          If you cook them longer, they'll disintegrate and cloud up the stock. 
  • Drain the stock through a large strainer, or ideally a chinois (see below). You potentially could be done at this point, if you skimmed well earlier. But the standard method is to strain the stock one more time, running it through cheesecloth or paper towels placed in the large strainer. 
          I can hardly emphasis enough that a true chinios makes this step SO much easier. 
          Read my article from last year: Why you want a Chinois, even if you don't know what it is


This one is 12 qt, on sale at amazon for $69. A GREAT bargain. 


Mine came with a turkey frying set, but this long stem 
thermometer is perfect for monitoring a stock pot. $12 at amazon
A sturdy, perforated metal strainer (not mesh). 
Long handle and lip (on left side of picture) allow you to rest
the chinois over a big bowl, pot, or even across a sink. 
Got it's name in French from a now politically 
incorrect and outdated reference to a "Chinese hat". 
A little pricey at >$40 at amazon, but a lifetime investment in convenience. 

Resolve to Be a Better Cook

I’m not a New Year’s resolution kind of person. I cringe when I see the annual articles asking celebs and politicos what they are resolving to do each year. How about you?

Without realizing it at first, it turns out that every year I do quietly resolve something to myself:  to be a better cook.

Even though I already love cooking and make many meals from scratch, I always want to find more dishes that my kids will like, or be able to cook faster and more reliably so our family can spend more or our precious, limited time together. We know that restaurants, take out and convenience foods help buy us time, but we trade them for high costs and usually unhealthy foods. Like any good resolution, don’t take on too much at once.

Here are a few ideas I have for you and your kitchen.
  • Try a new recipe at least once a month.
  • Make a favorite new recipe 5 times – you’ll be surprised how much you’ll learn each time.
  • Commit to “mastering” something you don’t like to do (or can’t yet do) in the kitchen, such as chopping garlic, boning a chicken, or making soup.
  • Upgrade key kitchen tools, such as a chef’s knife, peeler or cookware. The right tool for the job makes cooking easier and more enjoyable. Watch my recommendations – just replacing a tool may not be an upgrade.
  • Test a new ingredient, especially a vegetable or fruit. Tip: Get the whole family “in on it” in advance and make it fun. For example, create a feedback card to hand out to your eaters. If the dish fails, at least you didn’t push it on them solo; if it succeeds, you all win.

If you want to get started, next post includes a very simple recipe that is great for kids, but unique enough to please adults. White Turkey Chili with Garbanzo Beans and Barley.

It includes several uncommon ingredients and flavors – barley, garbanzo beans, marjoram and savory (you may need to visit the spice aisle for those last two, though). It’s not spicy, the tastes and textures are all comfortable and pleasing, so it’s a good way to play up “something new for the New Year”.

White Turkey Chili with Garbanzo Beans and Barley

I've been making this white chili for over 15 years. It differs from most white chili because it doesn’t try to taste like a red chili. With just a few simple aromatic and herb flavorings, it produces lots of taste, and has many different textures.

The original recipe came from a Gourmet Magazine "You Asked for It" column in the early 90’s. I transferred it onto a little scrap of paper so I could line up five or six recipes at to cook for a party. Over the years it got crumpled, stained and waterlogged. Even with Epicurious, I can't find this recipe online, so I'm grateful that the little scrap still survives. Like any good chili, it is both very filling and improves with age. The dish is slightly improved on day two, and we often make a batch and a half, or double batch to ensure plenty of leftovers. It also freezes relatively well, but needs an extra shot of pepper and herbs if frozen.

White Chili with Barley and Garbanzo Beans
1 large onion, chopped (about 1 cup or more)
2 tablespoons garlic, chopped coarsely
2 tablespoons olive oil
2 pounds boneless turkey breast, chopped into 1/2 to 3/4 inch pieces
2 tablespoons ground cumin
1 pound ground turkey
1 jalapeno, seeds removed, finely chopped (or more to taste)
1 cup barley
2 cans garbanzo beans, 16 ounces each, drained and rinsed
6 cups chicken or turkey stock
1 tablespoon dried marjoram, or 3 tablespoons fresh
1 teaspoon dried savory
2 tablespoons cornstarch
1/2 cup water

Serve with green onions, shredded Monterrey Jack cheese and fresh rustic bread
  1. In a large dutch oven or stock pot, soften onion and garlic over medium heat, approximately 5 minutes.
  2. Sprinkle cumin over vegetables and add turkey pieces. Saute turkey over medium high heat for 4-5 minutes until it loses pink color.
  3. Add the ground turkey and saute about 4-5 minutes, until all meats are cooked through. If necessary, drain excess fat, leaving 2-3 tablespoons in pot.
  4. Add jalapeno, barley, beans, stock and herbs. Bring to a boil and simmer 45 minutes.
  5. Combine starch and water in a small bowl. Add to pot and simmer 5 minutes to thicken. Adjust S&P.
Serve piping hot in bowls, topped with scallions and cheese and a chunk of fresh bread.

What Makes This Recipe Work?
  • It's not really chili. Maybe it's in the chili family, but is a standalone, unique entry into the category.
  • It's not spicy or sharp tasting. Though there is jalapeno (quantity to your taste, of course), and a little bit of cumin, again, it departs from traditional chili flavorings.
  • The tiny amount of herbs and the important contribution from a good, preferably homemade, stock is what imparts a unique flavor.
  • The interesting combination of barley and garbanzo beans. There are not a lot of barley based dishes out there, especially ones that are not an ethnic staple of some sort.

A Little Information for My New Subscribers

With lots of new Kindle, email and online subscribers, I thought that for the next few weeks I'll rerun some of my more popular columns from last year. These posts will be in addition to what I've already got planned for the week - just a little bonus for the new readers.

This week I'll start with last year's article "Resolve to Be A Better Cook" and the accompanying recipe "White Turkey Chili with Barley and Garbanzos".

The recipe is a LOT easier than the title might make it sound. Barley and garbanzos can be found in every supermarket (though you might have to ask where the barley is) - and they're easy to cook.

LinkWithin

Related Posts Plugin for WordPress, Blogger...